Download the universal adb on windows xp driver. Manual installation of the ADB driver. Installing ADB and Fastboot from the Android SDK
The ADB and Fastboot utilities are included in the Android SDK development kit (do not confuse it with Android Studio, much less download its cumbersome installation file, unless, of course, you intend to develop for Android). ADB is a debugging tool that allows you to access the Android console from a computer (by connecting the gadget to a PC via USB. At the same time there should be . Fastboot is designed to work with the device when it is loaded in the mode of the same name (if your device has one).
Using ADB, you can manage your smartphone/tablet from your computer: make a backup of applications, record a screencast, put your smartphone in Recovery mode, and much more. In addition, you can work with ADB via Wi-Fi. To do this, your device must have root rights, and you will also need a special application that connects to your computer over the network. For example, ADB Wireless or WiFi ADB. But this is material for a separate article.
Using Fastboot, you can, custom Recovery (or), unlock Bootloader (on HTC, Motorola, Sony, Nexus, Huawei, the latest LG devices it is blocked), clean system partitions.
How to install ADB and Fastboot: instructions
1. Go to the official website where you can download the Android SDK: https://developer.android.com/studio/index.html. Scroll down to the “Command line tools only” section and select the archive for Windows.

2. Check the “I have read and agree with the above terms and conditions” checkbox and click the “Download Android Command Line Tools for Windows” button. The archive will begin downloading.

3. Download it and unzip it to the root of Drive “C:”.
4. You also need to download the Java Development Kit from the official page. Go to the website, agree to the terms of the license agreement by checking the “Accept License Agreement” box, and download the JDK version that matches the bit size of your system.

First way
Go back to the Android SDK folder, open “tools” and run “android”.

Check "Android SDK Platform-tools" (and also "Google USB driver" if you have a Nexus device) and click "Install Packages".

Read below about installing drivers for other devices.
Select "Accept License" and click "Install".

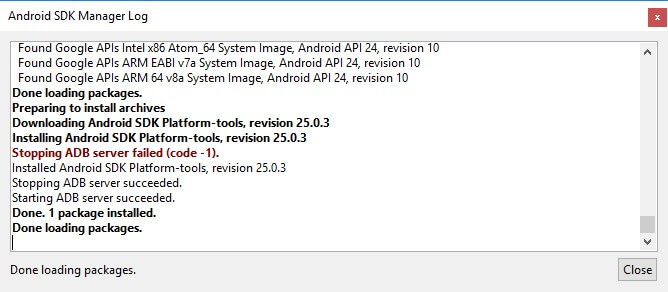
My log showed that there was an error. But in the end everything ended successfully.
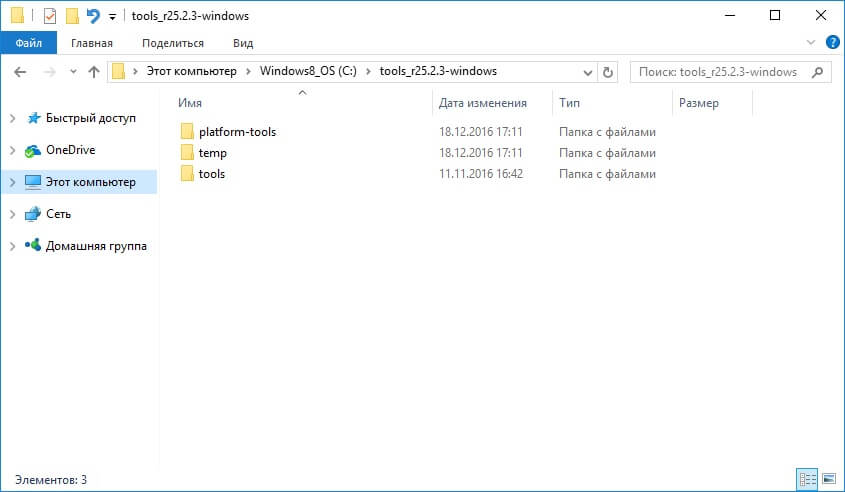
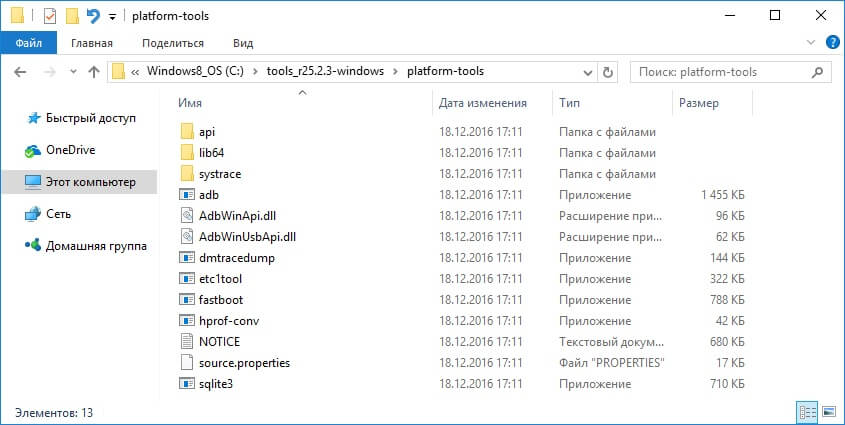
After completing the above steps, in the “sdk-tools-windows-” folder version“platform-tools” will appear, and it will contain the “ADB” and “Fastboot” that we are interested in.
Second way
Go to the folder "sdk-tools-windows- version» → “tools” → “bin” and, holding down the “Shift” key, right-click on an empty area. Select "Open a command window" or "Open a PowerShell window here" if you have one of the latest builds of Windows 10 installed on your PC or laptop.

Paste the command into PowerShell or Command Prompt (in PowerShell add ./ at the beginning):

Click "Enter" to execute the command. The files will download and you will be asked to install:

To enable, type y, that is, “yes”, and press “Enter”, after which the installation of “platform-tools” will begin.

At the end, a message will be displayed on the command line that the procedure completed successfully. And the “platform-tools” folder with ADB and Fastboot inside will appear in “sdk-tools-windows- version».
(!) If for some reason you cannot install ADB and Fastboot using the previous methods, use the third option - simply download the “platform-tools” archive and unzip it to the “C:” drive.
Installing ADB and Fastboot drivers for Windows
For a computer, smartphone or tablet, you need to download the USB driver:
- Samsung - the driver is included in the Kies utility: http://www.samsung.com/ru/support/usefulsoftware/KIES/ or you can download it separately by selecting the desired model: http://www.samsung.com/us/ support/downloads
- HTC – as part of HTC Sync Manager: http://www.htc.com/ru/software/htc-sync-manager/
- Nexus - Android driver is installed along with the Android SDK, as described above.
- Huawei - together with the HiSuite utility: http://consumer.huawei.com/minisite/HiSuite_en/index.html
- LG – install LG PC Suite: http://www.lg.com/ru/support/software-firmware
- Motorola - see this page: https://motorola-global-portal.custhelp.com/app/answers/detail/a_id/88481
- Sony Xperia - FastBoot drivers for all models are here: http://developer.sonymobile.com/downloads/drivers/
- Xiaomi – Mi PC Suite: http://pcsuite.mi.com
- MTK – for Chinese devices on MediaTek chips: http://online.mediatek.com/Public%20Documents/MTK_Android_USB_Driver.zip
- Lenovo - select your smartphone or tablet model and download the ADB driver: http://support.lenovo.com/us/en/GlobalProductSelector
- Look for solutions for devices from other manufacturers on their official websites.
There are various universal ADB driver installers (for example, this one: http://adbdriver.com/downloads/) - they can also be used, for example, when for some reason it was not possible to install the official solution.
If your model comes with a driver without an installer, you will have to do the following:
1. Go to “Control Panel” → “Device Manager”. In Windows 10, just right-click on the Start menu and select Device Manager.

2. Find in the list the device for which you need to install drivers. Right-click and click Update Drivers.

As you can see, the computer correctly recognizes my Nexus 7 tablet. If your PC detects the smartphone incorrectly or there is a yellow triangle with an exclamation mark inside next to the device, “manual” installation of Android drivers is required for you.
3. Select “Browse this computer for driver software.”

4. Specify the path to the driver folder on your PC.

Wait until the installation is complete and then reconnect the gadget to your computer via USB.
How to get started with Fastboot and ADB
Working with ADB or Fastboot is done from the command line; the utilities are launched in two ways:
1: Right-click on “Start” and select “Command Prompt (Admin)” or “Windows PowerShell (Admin)”. Next, using the commands, specify the path to the folder with ADB and Fastboot (after entering each, press “Enter”).
To return to the root of the "C:\" drive, use:
Thanks to this command we open the desired folder:
In my case it turned out like this:
cd\tools_ version-windows\platform-tools
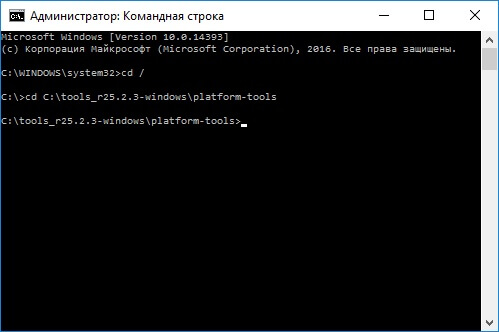
You will get (Google developers changed the name of the archive after writing the original version of this instruction):
cd\sdk-tools-windows- version\platform-tools
The path to Fastboot and ADB is indicated, now we work with them from the console.
To avoid having to do this every time, add the path to "platform-tools" to the "Path" variable. First, go to the folder, in the navigation bar, right-click on “platform-tools” and select “Copy Address”.

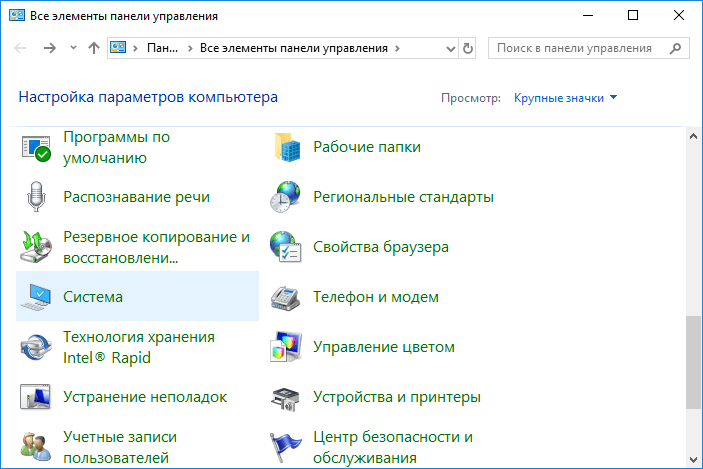
Go to "Control Panel". To do this, press “Win” + “R” and in the “Open:” field, paste control . Click OK.

Select System → Advanced System Settings → Environment Variables....

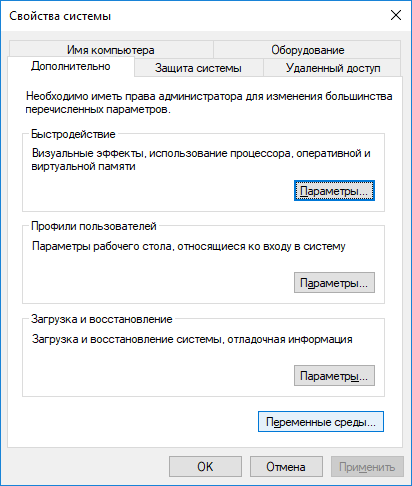
Find the "Path" variable, highlight it and select "Edit...".

Click New, paste the path to the "platform-tools" folder and click OK.

ADB (Android Debug Bridge Utility) is a command line included in the Android SDK. ADB allows you to control your device via USB, copy files, install and uninstall applications and much more. ADB allows you to use some Android tricks.
Step 1: Install Android SDK
Go to the Android SDK download page and scroll down to “SDK Tools Only”. Download the ZIP file for your OS and extract the archive.
Run the SDK Manager exe file and uncheck all items except “Android SDK Platform-tools”. If you are using a Nexus smartphone, you can also check the “Google USB Driver” checkbox to download the drivers. Click on the install button. Components will be downloaded and installed, including ADB and other utilities.
When the installation is complete, you can close the SDK manager.
Attention! Currently the installation proceeds as follows:
Go to the Android Studio download page, scroll down to the “Get just the command line tools” section and download the archive for the appropriate OS version (in our case, it’s Windows).

Unzip the downloaded archive, for example, to the root of drive C.
Interaction with SDK Manager is carried out through the command line. You can recognize all the commands, but we will focus on the main ones. To launch SDK Manager, go to the folder where you unpacked the contents of the archive > tools > bin and hold down the Shift key, right-click on an empty area and select “Open command window” if you are using a version other than Windows 10. Or run the command line and specify the working directory. In my case it's:
Cd C:\sdk-tools-windows-3859397\tools\bin

Enter the command sdkmanager and press Enter to see all available options. But we are interested in the following command:
Sdkmanager "platform-tools" "platforms;android-26"
This command will install platform tools (including adb and fastboot) and SDK tools for API 26, which corresponds to Android version 8.x. The full list of Android versions and their corresponding APIs is described below:
- Android 1.0 - API 1
- Android 1.1 - API 2
- Android 1.5 - API 3
- Android 1.6 - API 4
- Android 2.0 / 2.1 - API 5, 6, 7
- Android 2.2 - API 8
- Android 2.3 - API 9, 10
- Android 3.0 / 3.1 / 3.2 - API 11, 12, 13
- Android 4.0 - API 14, 15
- Android 4.1 / 4.2 / 4.3 - API 16, 17, 18
- Android 4.4 - API 19.20
- Android 5.0 / 5.1 - API 21, 22
- Android 6.0 - API 23
- Android 7.0 / 7.1 - API 24, 25
- Android 8.0/8.1 - API 26
Because I have a device with Android 7.0, then my command will look like this:
Sdkmanager "platform-tools" "platforms;android-24"
You can also do this step through the Android Studio GUI. To do this, go to the download page, download, install and launch Android Studio.
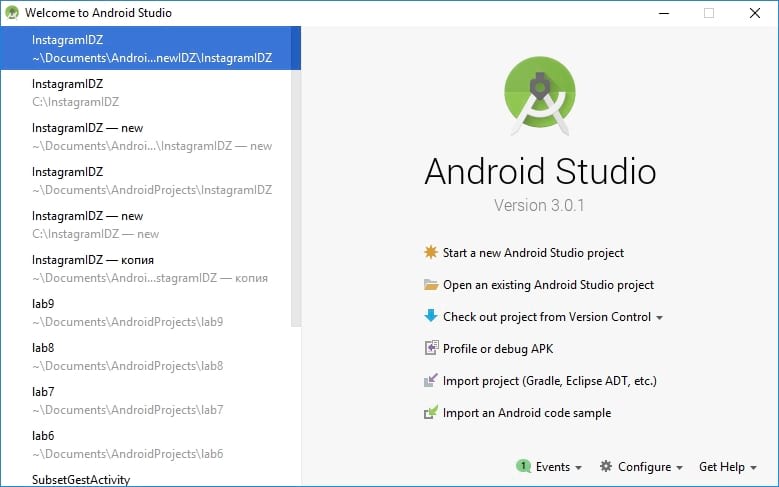
Click "Configure" and "SDK Manager".

Make sure there is a checkmark next to “Android SDK Platform-tools” and “Google USB Drive” if you are using a Nexus device. Click "OK" to close SDK Manager and also close Android Studio.

Step 2: Enable USB Debugging
Go to your phone settings and select "About phone". Scroll down to Build Number and click on this item 7 times. A message should appear indicating that you are logged into developer mode.
Return to the main settings page, you should see a new “For Developers” item. Enable “USB Debugging”. Enter a password or PIN if required.

Once you do this, connect your phone to your computer. You will see a window on your phone asking “Do you want to enable USB debugging?” Check the box next to “Always allow on this computer” and click OK.
Step3: Testing ADB and installing drivers for your smartphone
Open the folder where the SDK is installed and open the platform-tools folder there. The ADB program is stored here. Hold down the Shift key and right-click inside the folder. Select "Open Command Window".
To check if ADB is working properly, connect your Android device to your computer using a USB cable and run the following command:
adb devices

You should see the device listed. If the device is connected to the computer, but it does not appear in the list, then you need to install the ADB driver for your device. There should be corresponding files on the website of the manufacturer of your device. For example, for Motorola devices you can download them, for Samsung, for HTC drivers are included in the HTC Sync Manager program. You can also find the required files on the XDA Developers site without any additional software.
You can also install Google USB Driver from the Extras folder in the SDK Manager window as we mentioned in the first step.

If you use the Google USB driver, you will have to force Windows to use the installed drivers for your device. Open Device Manager (right-click on the My Computer shortcut and select Properties - Device Manager), find your device in the list. Right-click on it and select Properties. Go to the Driver tab and click the Update button. Select "Browse this computer for driver software."
Find Google USB Driver in the Extras folder with the SDK installed, and select the google\usb_driver folder and click Next. Once the drivers are installed, try running the adb devices command again. If everything is done correctly and the drivers are suitable, you will see your device in the list. Congratulations, you were able to install the ADB driver.
Useful ADB commands
ADB offers some useful commands:
Adb install C:\package.apk
— Install the application on your phone, located at the path C:\package.apk on your computer;
Adb uninstall package.name
— Remove the application named package.name from the device. For example, the command com.rovio.angrybirds will remove the Angry Birds game;
Adb push C:\file /sdcard/file
— Places a file from the computer to the device. This command will send the file C:\file on the computer to the device along the path /sdcard/file<.
Adb pull /sdcard/file C:\file
- Works like the previous command, but in the opposite direction.
If you have a phone or tablet running Android OS, then you probably want to connect it to your Windows 10 device, for example, to transfer files. In this case, we recommend downloading ADB drivers for Windows 10 - special file libraries that simplify the operation of two devices on different OSes.
Peculiarities
Typically, there is no need to download ADB drivers for Windows 10 if all you need is to transfer files. These drivers have a much broader purpose:- Transfer files from device to device;
- Get ROOT rights to Android OS;
If this version of drivers suddenly does not suit you, then don’t worry, you can always download - this is a universal program for automatically searching and installing any drivers, including ADB.
Despite the fact that the program is completely free, it is very functional. Version available in Russian and English. For those who want to simultaneously download an antivirus program to avoid infecting their smartphone, we recommend using
Finding USB driver for your Android is almost a difficult task, if your smartphone or tablet manufacturer doesn’t provide a PC suite or if you don’t own a famous brand smartphone or tablet. To resolve this issue, today we are going to introduce an Universal ADB driver and installing it will let you to connect any of your Android device with computer successfully.
The Universal ADB driver given here is a windows based driver and it is compatible with almost all the Windows versions: Windows Vista, Windows XP, Windows 8, Windows 7, Windows 10 and Windows 8.1. Also, it supports almost all the Android smartphone and manufacturers in the world (Example: Samsung, Xiaomi, HTC, Panasonic, LG, Micromax, Intex, Lava, Gionee, InFocus, etc.)
Universal ADB Driver Features:
1) Supports All Android Devices: The Universal ADB driver supports almost all android devices (including major brands like Samsung, Lenovo, HTC, Sony, etc.). Just download the driver, connect your Android smartphone and install the USB driver.
2) Automatic Brand Detection: This software detects the brand and chipset of your smartphone automatically and install the USB driver accordingly. Also, the Universal ADB driver comes in a quick installer format i.e., just by clicking the “.exe” file, you will be able to install the driver of your device.
3) Supports 32 bit and 64 bit Windows Versions: This software supports both 32 bit (x86) and 64 bit (x64) Windows OS versions. Also, you can use this software on all Windows versions including Windows 10, Windows 8.1, Windows 8, Windows 7, Windows Vista and Windows XP.
4) New Refresh Button: The new version of this software (Version 2 and Version 3) comes with a refresh button, which you can use to refresh the device list. This feature was not available in the initial version of this software.
– Latest Version
How To Install Universal ADB Driver:
1) Before beginning the installation of Universal ADB driver, make sure that you have connected your smartphone to the computer using the original USB data cable as the ADB driver installer won't detect your device, if you connect it after you begin the installation process .
2) To get started, download Universal ADB driver and extract its zip package to a folder in your computer. Now, you will find the “ universaladbdriver_v3.0.exe" file.
3) Now, click on it to launch the Universal ADB driver installer.
4) Once the installer is launched, it will automatically detect your smartphone or tablet since you have already connected your smartphone with the computer.

5) Now, you will be able to see your smartphone or tablet model number in the Installer’s device list. Also, you will see the message “ Driver incorrectly"under" Device status“, which indicates that you haven’t installed the ADB driver in your computer.
6) Next, click on “ Install” in the Universal ADB Driver installer to begin the installation process. Once you do that, you will get a Windows Security Prompt stating that they can’t verify the publisher of the driver. Just ignore it and click on “ Install this driver software anyway” to install ADB driver in your computer.

7) After the installation is successfully finished, you will be able to see a green progress bar in the Installer along with the message “ Installation Success“.
That's it. Now you have successfully installed ADB driver for your android device in your computer.
Points To Remember:
1) The Universal ADB driver supports almost all Android devices. So, if your smartphone manufacturer doesn’t offer a PC suite, then downloading and installing this will let you connect your smartphone with the computer.
- Tutorial
And here an unpleasant surprise awaited me - either the native driver turned out to be crooked, or Windows, or the wire... in general, the driver stopped working, the Windows Device Manager reported that the device was fully operational, but upon request adb devices I received an empty list in the console and, naturally, I was unable to test the application on the tablet.
I wrote a request to TeXeT support, they even answered me with a link to the driver itself, which, as I was already convinced, did not work. I started looking for an answer on the Internet and found a bunch of different assemblies of this driver and manuals, but still none of them started up properly, and even the native driver from the SDK didn’t work at all, which made me despondent... but not despair.
Here I decided to try my hand at writing drivers using the good old method of scientific poking and opened the driver inf file. What gave me hope was the understanding that the software part of the adb interface on the tablet side should be identical for all devices, and USB worked anyway. And so, after several unsuccessful attempts at manually editing the inf file, I found a recipe for treating the inf file seasoning so that it would install and, most importantly, work.
So let's get started.
Step 1. Download the driver. If you haven't already done so, open Android SDK Manager, find the Extras section, check the Google USB Driver box, and click Install Packages. It's simple. Wait for it to load.
Step 2. Find the driver and make a copy of it in a separate folder. Go to the %android-sdk%\extras\google\ folder and see the treasured usb_driver folder there. Copy it somewhere, and we will carry out further manipulations there. In principle, you can edit the “original”, but I preferred to keep the original intact just in case.
Step 3. Edit the inf file. In the folder, open the file android_winusb.inf and look for lines like this:
;Google Nexus One %SingleAdbInterface% = USB_Install, USB\VID_18D1&PID_0D02 %CompositeAdbInterface% = USB_Install, USB\VID_18D1&PID_0D02&MI_01 %SingleAdbInterface% = USB_Install, USB\VID_18D1&PID_4E11 %CompositeAdbInterface% = USB_ Install, USB\VID_18D1&PID_4E12&MI_01
Make a copy of these lines and replace Google Nexus One on %your_device_name% for identification in the future and... open the Windows Device Manager. We are looking for our device there ( Android, Android Composite ADB Interface or something like that). Open the device properties, the “Details” tab, select the “Equipment ID” item in the list and see this picture.
We copy the line that is most similar to the one shown in the figure (It is, in theory, just a little shorter), and paste it into our inf file.
;TEXET TM-7025 %SingleAdbInterface% = USB_Install, USB\VID_18D1&PID_0003 %CompositeAdbInterface% = USB_Install, USB\VID_18D1&PID_0003&MI_01 %SingleAdbInterface% = USB_Install, USB\VID_18D1&PID_0003 %CompositeAdbInter face% = USB_Install, USB\VID_18D1&PID_0003&MI_01
In %SingleAdbInterface% we delete the end of the line; as you can see, in %CompositeAdbInterface% we insert the whole line. There’s probably no need to repeat everything twice, but I already have everything and I’m too lazy to experiment :)
We save (be careful - in some cases you need to run notepad with administrator rights, because in user mode you will not be allowed to overwrite the inf file).
Step 4. Driver installation. Now that everything is prepared, go back to the device manager and remove all previously installed adb drivers (if any). We update the list of devices and see our device without drivers. We open its properties and select “update drivers”, select the installation from the folder, specify the folder with the corrected inf and start the installation - our driver is instantly found, but during installation it may swear about incompatibility with the question “should I continue, nasalneka?” Let's continue. That's it, the driver is installed.
Step 5. Final. To be precise, unplug the USB port, wait until everything is detected, open the console (Win+R, enter cmd) and write adb devices. If everything went well, we see the treasured list item, indicating that adb now sees our device. 
From now on, you can safely launch eclipse and build programs, enjoying convenient automatic assembly, installation and the ability to debug directly on your device.
If the adb command does not work for you at all. Computer -> Properties -> Environment Variables. We are looking for the Path variable and at the end we add(in no case do we overwrite it) at the end there is a semicolon, and after that the address of the folder where adb lives (usually %android-sdk%\platform-tools\). After a reboot it should work.
Sometimes adb does not start automatically when the system starts. Start manually.
What was it?
It's actually simple. For some reason (Winda is a must-have / progers have crooked hands / the Google inf-file was written only for native Google devices / the Higgs bosons have ruined everything on your computer), Windows does not want to use the Google driver for non-Google devices that are not recorded in the inf-file. Apparently, everything there is tied to these ID equipment. But the software on the vast majority of Android devices is identical in terms of the debugger connector to the PC, so the driver should communicate normally with any Android device. Our task is to deceive Windows and force it to accept the device as a “driver-compatible” device, which we did by adding its ID to the driver inf file.
I hope this manual will help someone get their own Chinese or other device for which they forgot to make a normal adb driver when assembling the system, or for those who are bothered to download the official driver from the device manufacturer (this can be so annoying that it’s faster to do everything described above - This happened to me with the driver for the LG E510 phone).
P.S. I have not conducted mass testing of this method, so I cannot guarantee that it will work 100% in all cases. But it worked for me on Windows 7, and then on Windows 8. I had to edit the file separately for each time, but I don’t think that’s such a problem.